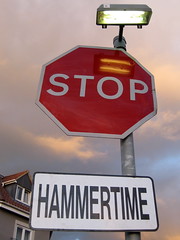
mc hammer lives in brislington
Originally uploaded by Nevoir.


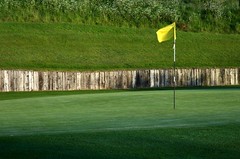
After having been inspired by a recent Chase Jarvis blog about trying something new I took his advice and had a go at combining two great passions of mine, photography and golf.
The shot above is one of many I got from a fantastic evening shoot at a local course during which I was lucky to get both some good light and free reign of a pretty deserted course.
What struck me as I was taking the shots was how I go through a series of steps when taking a photo that I always go through but never really give much consideration at the time.
In the interests of sharing know how i've outlined some important things to consider when you are out with your camera.
1. Choose your composition
I always use a tripod for this type of shot. The problem with tripods is that they are a hassle to adjust. Frame your shot with your camera in your hands then set up your tripod to suit.
I recently switched from a pan/ tilt tripod head to a ball head and love it. It's so much quicker and easier to use and is smaller and lighter to boot.
2. Check your camera
Check your ISO, white balance and quality settings regularly. You can correct the white balance at home if you are shooting raw but if your quality and ISO are off the mark you could well have wasted a day shooting.
3. Decide what you are trying to do
The camera allows us to control what effect we get from our resulting photo. If we want to freeze or blur motion we can set the shutter speed to get the effect we want. If we are primarily concerned with depth of field we can control the aperture. This is a key decision.
Landscape photographers as a rule are primarily concerned with depth of field. Typically, we like a wide depth of field which renders the whole scene in focus. This often results in long shutter speeds being required to make a properly exposed photograph.
For the shot above all I was interested in was maximising the sharpness and optical quality of the shot. The sweet spot of any lens is when it is set to f8, so I set the aperture to f8 and adjusted the shutter speed to suit.
I wasn't interested in what the shutter speed was as the camera was on a tripod and I wasn't trying to get any shutter speed effects like blur or whatever.
One other shot I should have tried is to get a bit more movement in the flag. To do this I would have set the shutter to say 1/30th, tweaked the aperture to give a correct exposure then took a shot to see if 1/30th gives enough movement.
It's all about deciding what you are trying to do and then experimenting until you nail it, pixels are free so play around with different effects. The best way to learn is to stick the camera in manual mode and go from there to make sure that you are making all of the decisions and you can see the results of the decisions that you are making.
4. Review the scene
Rest assured that however you have composed your shot you can always improve it. Check the entire scene for distracting elements such as litter or stray vegetation. Make sure your camera is level by investing in a hot shoe bubble level...only about a tenner but will last forever and you'll use it every time.
5. Try a variation of what you are doing
There is nothing more annoying that after bothering going to a location and doing everything right to get home and when reviewing your photos to think if only I had tried something else with that scene.
When you are in the field just try something else. If just one of these variations works out it will have been worth it. If it doesn't work just delete it, it's that simple.
------------------------------
Kit shopping list: