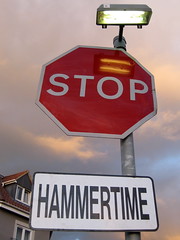
mc hammer lives in brislington
Originally uploaded by Nevoir.

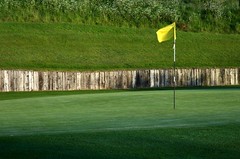
After having been inspired by a recent Chase Jarvis blog about trying something new I took his advice and had a go at combining two great passions of mine, photography and golf.
The shot above is one of many I got from a fantastic evening shoot at a local course during which I was lucky to get both some good light and free reign of a pretty deserted course.
What struck me as I was taking the shots was how I go through a series of steps when taking a photo that I always go through but never really give much consideration at the time.
In the interests of sharing know how i've outlined some important things to consider when you are out with your camera.
1. Choose your composition
I always use a tripod for this type of shot. The problem with tripods is that they are a hassle to adjust. Frame your shot with your camera in your hands then set up your tripod to suit.
I recently switched from a pan/ tilt tripod head to a ball head and love it. It's so much quicker and easier to use and is smaller and lighter to boot.
2. Check your camera
Check your ISO, white balance and quality settings regularly. You can correct the white balance at home if you are shooting raw but if your quality and ISO are off the mark you could well have wasted a day shooting.
3. Decide what you are trying to do
The camera allows us to control what effect we get from our resulting photo. If we want to freeze or blur motion we can set the shutter speed to get the effect we want. If we are primarily concerned with depth of field we can control the aperture. This is a key decision.
Landscape photographers as a rule are primarily concerned with depth of field. Typically, we like a wide depth of field which renders the whole scene in focus. This often results in long shutter speeds being required to make a properly exposed photograph.
For the shot above all I was interested in was maximising the sharpness and optical quality of the shot. The sweet spot of any lens is when it is set to f8, so I set the aperture to f8 and adjusted the shutter speed to suit.
I wasn't interested in what the shutter speed was as the camera was on a tripod and I wasn't trying to get any shutter speed effects like blur or whatever.
One other shot I should have tried is to get a bit more movement in the flag. To do this I would have set the shutter to say 1/30th, tweaked the aperture to give a correct exposure then took a shot to see if 1/30th gives enough movement.
It's all about deciding what you are trying to do and then experimenting until you nail it, pixels are free so play around with different effects. The best way to learn is to stick the camera in manual mode and go from there to make sure that you are making all of the decisions and you can see the results of the decisions that you are making.
4. Review the scene
Rest assured that however you have composed your shot you can always improve it. Check the entire scene for distracting elements such as litter or stray vegetation. Make sure your camera is level by investing in a hot shoe bubble level...only about a tenner but will last forever and you'll use it every time.
5. Try a variation of what you are doing
There is nothing more annoying that after bothering going to a location and doing everything right to get home and when reviewing your photos to think if only I had tried something else with that scene.
When you are in the field just try something else. If just one of these variations works out it will have been worth it. If it doesn't work just delete it, it's that simple.
------------------------------
Kit shopping list:
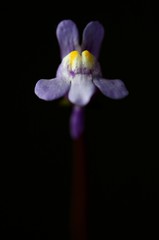
Well after a lengthy unintentional sabbatical from this photo blog its time to resurrect things.
This shot follows a couple of weeks of study around off camera flash. The source of knowledge was inevitably Strobist and the catalyst was buying a set of Elinchrom Skyport radio triggers from the guys at London Flash Centre.
I've been following the Strobist blog for years and always meant to get my head down and follow the lighting 101/ 102 tutorials. It turned out that the best route in for me was to get the strobist dvd and go from there. It is a fantastic learning resource and I found it the best way to join the dots of my patchy knowledge.
This shot was really quick to set up and can be done and dusted in 20 mins.
Anyway, the recipe for this shot is as follows.
You will need:
- Subject
- Something to trigger the flash
- Flash with something to diffuse the light
- Camera + tripod etc...
- Macro lens
1) Set up camera and tripod and choose your first composition with your subject.
2) Choose what you want to focus on while the main light is on as once the lights are out autofocussing becomes almost impossible.
Once you've selected your focus knock the auto focus to manual so that it wont shift. For this shot I chose to focus on the yellow "eyes" as they were an interesting feature.
3) Set up your flash and diffuser (I used a shoot through brolly) and position it as close as you can to the subject (from camera left).
4) Check your flash is triggering and that your subject is getting the light coverage you want.
5) Set your camera to manual mode and set the shutter to its synch speed. My D70 will synch up to 1000th sec but I went for 500th sec for this shot. A super fast shutter will leave you with a really, really under-exposed exposure which gets you that black background (without needing to bother using a piece of black card or whatever).
If you cant synch that fast don't stress, your cameras synch speed should be fast enough to knock the background out as long as your environment isn't too bright.
So your shutter speed gives you your black background and to get the narrow depth of field I chose an aperture of f4. The job of the flash is to illuminate the subject. This point of the shutter controlling the natural or ambient light and the flash controlling the light on the subject is absolutely fundamental to understanding how this stuff works.
6) Set the flash to manual and choose a setting to start with. The final setting on the flash was 1/8th power.
7) Turn the main lights out and set the white balance on the camera to Flash. I shot this at ISO 200 and shot raw files as ever.
8) Take a test shot using a cable release or use the self timer. It's probably not strictly necessary for this sort of shot with flash but its a force of habit and good practice I guess.
9) Check your histogram to see how close you are. If you are too dark either boost the flash power or move it closer if you can. You can also open up the aperture if you want but if you want f4 then change the flash to suit.
Whatever you do don't try and learn about the law of reciprocity which explains how this flash/ subject ratio all works because your eyes will bleed.
10) If you don't like the strong shadow on the right hand of the subject just hold some white card on that side to bounce some light back into the shadows.
This kind of shot is perfect for when the weather is too bad for a landscape session or its dark because you're back from work late and you've just got to create something.
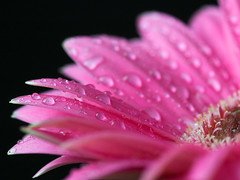
After reading Scott Kelbys excellent "Digital Photography" book I felt inspired to apply some of the stuff that I had picked up and spent a great few hours last weekend getting some new macro shots.
The approach of the book is to offer advice as if the author was there to ask directly how to get the shot. What this turns into is the equivalent of recipes for photos, which if you follow you cant help but get something like the picture that they show in the book.
This isn't to say that this photo lark is formulaic but you can't get away from the fact that there's a fair bit of technique going on here that anyone can follow to get some great results.
So following suit I thought i'd pass on the love and follow a similar format here. So in a true recipe format here goes, this is the recipe I followed to get this shot.
What I used:
How I got the shot:
Tips
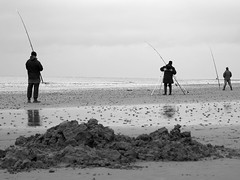
Up by the lighthouse on the beach at Burnham on sea I came across these guys fishing in the Bristol channel. It was absolutely freezing and pretty bleak, the first guy wasn't using a tripod so was just stood there waiting for a knock. They had a gas lamp with them so god knows how long they were staying out for, good on em.
The pile of sand in the foreground is from where these guys had been digging for bait, lugworm I guess. Its either that or where some poor bugger has sunk into the killer quick sand that seem to be all over this beach, I nearly lost my boots at one point.
New years day was pretty bleak and there was so little colour in the image that it was definitely one to be converted into black and white. I like the result, it conveys the mood of the day.
A good recent discovery is that the guy who presents many of the fishing programmes on discovery is also a photo journalist. His name is Henry Gilbey, check out Henrys site.
Details:
f5.6
1/60 sec
iso 200
nikon d70
50 mm 1.8 lens
handheld
We met my new niece on Saturday and here she is. I've been spending a couple of evenings properly getting to grips with rawshooter and its pretty darn useful. I think from here on in its gonna be raw files all the way so I will be mostly investing in bigger cards and some more backup storage.
Speaking of backups I think its time to back everything to somewhere safe...these guys at databarracks could be useful!
Anyroad, this shot was another in my unplanned series of shallow depth of fielders and although some may argue a touch cliche I really like it. I converted it into black and white in rawshooter as I still dont have a de facto method in photoshop. Im finding myself following the Andy Rouse philosophy of minimising time spent at the pc, thats gotta be a winner. The fact that I can do everything in rawshooter except final crops and levels tweaks is premier league.
Speaking of Andy Rouse he has started a blog on his site...its well worth a read...